Overview
To create a workflow that contains decision trees (i.e., a workflow with conditional tasks), create a BPMN process workflow. For example, if Option A occurs, send the workflow to Person 1, but if Option B occurs, send the workflow to Person 2.
The Workflow Folder must be set up by a Process Administrator (Administration > Folder Configuration) before you can proceed.

Use a pen and paper to draw out the map before you begin. What flow do you want to see? Who starts and ends the workflow? What tasks need to be completed? Who are the actors? Are there any fields that affect where the document goes? Mark those conditions.
Save frequently on the Bpmn Editor screen to avoid losing data if you are timed out of the application.
Basic Two Step Workflow
This example shows the workflow for a basic “Review and Approve” process. The workflow begins with a Review task assigned to the Review Group. This task has one complete option. Once the Review task is completed an Approve task is created and assigned to the Approval Group. The Approve task is followed by a user driven exclusive gateway. This means there is a decision to be made by the user when completing this task. The Approve task will have two complete options. The default option is to approve the task and end the workflow. The second option is to send the workflow back to the Review task. If the “More Information Required” option is chosen when completing the Approve task, the workflow will create a new Review task and assign it to the Review Group.
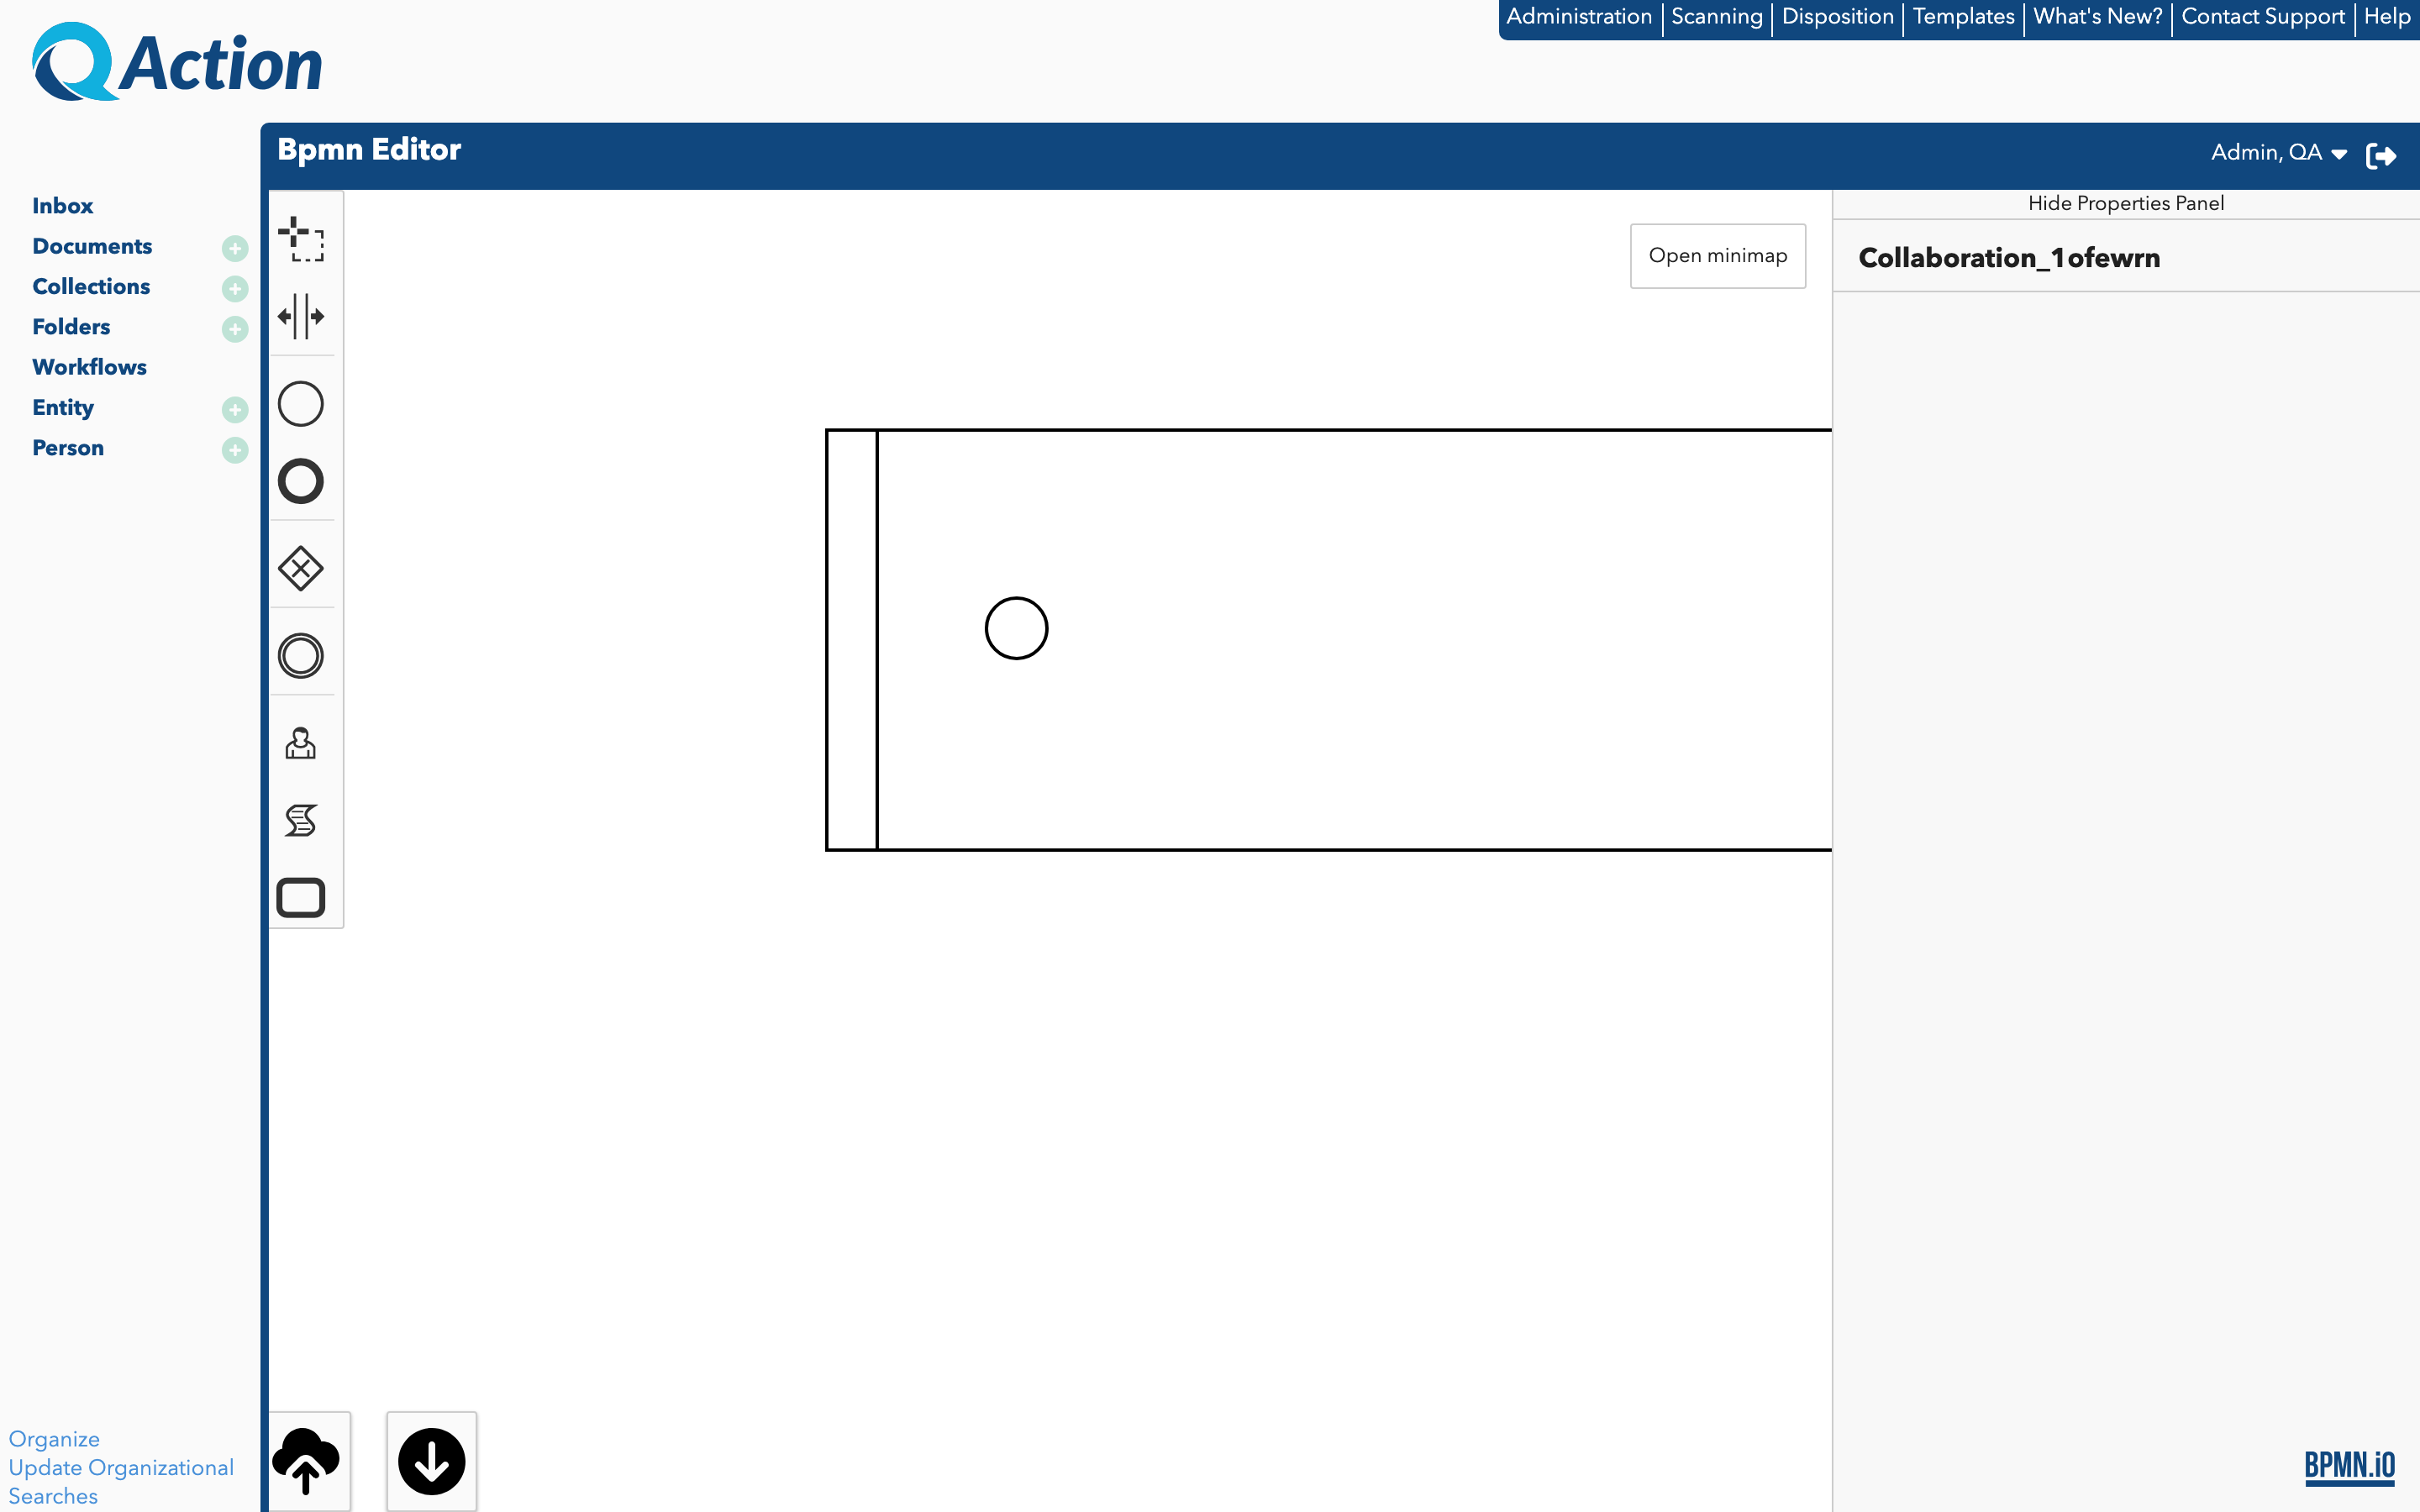
Modeler Overview

Screen descriptions:
- Lasso tool - Click and drag to select one or several parts of your workflow at once.
- Create or Remove Space tool - Click a workflow field barrier and drag to expand or decrease the white space.
- Create Start Event tool - Insert this symbol to begin a workflow (by default, this symbol automatically appears in the workflow field).
- Create End Event tool - Insert this symbol to complete a path in the workflow.
- Create Exclusive Gateway tool - Insert this symbol to create a conditional decision path.
- Create Intermediate Throw Event tool - Insert this symbol to create a workflow event.
- Create User Task tool - Insert this symbol to create a user task within the workflow.
- Create Script Task tool - Insert this symbol to create script task within the workflow.
- Call Activity tool - Insert this symbol to create a call activity that inserts another BPMN process into the current proces.
- Save button - Save the workflow.
- Save SVG button - Save the workflow as an SVG image to your local drive.
- Workflow Title Bar - Enter the name of the workflow.
- Workflow pool- Insert all workflow nodes here.
- Start Event symbol - Represents the start of the workflow.
- Properties panel - Customize fields and information for each node.
- Mini Map - Used for navigation of the canvas.
Node Options
Clicking on a workflow node will display some operations that can be performed for the specific node.


- Add a node after the selected node (ex: Task, Gateway, End Event)
- Add a comment box to the node
- Node Modifications
- Wrench - Change the type of the node
- Trashcan - Delete the node
- Add a sequence edge from the selected node
- Add a swim lane to the pool
- If a task needs a different user, group, or organization assigned to perform it, then the task must exist in its own swimlane. Each lane is assigned unique a user, group, or organization.
Using a position or organization is ideal for these workflows (instead of an individual user). Assigning a position or organization is better for handing off work when there is a position change. Additionally, the flow of the tasks may be interrupted if an individual user is selected.