1. Navigate to the search bar from your Windows desktop. Then type in Default Apps and select that option from the list of suggestions.

2. Scroll down to the Outlook application in the list. Then click on the Outlook Classic option.
***Notice if there are more than one Outlook options, you have to pic the icon that is reflected in the screen print. It's appears to be a more "boxy" icon, not the rounded icon.

3. Each email file type extension will show in the list and you can click in each field listed to select a default application.

4. Once you see the pop-up, select the Outlook icon that is more boxy and not rounded. Then click Set Default. Repeat those actions for each of the email file extensions listed.
This will ensure that all email files you may view, will open using the correct version of Outlook.

5. Then you will click the back arrow (←) next to Settings in the top left corner

6. Scroll down to the bottom of this page and click Choose defaults by file type

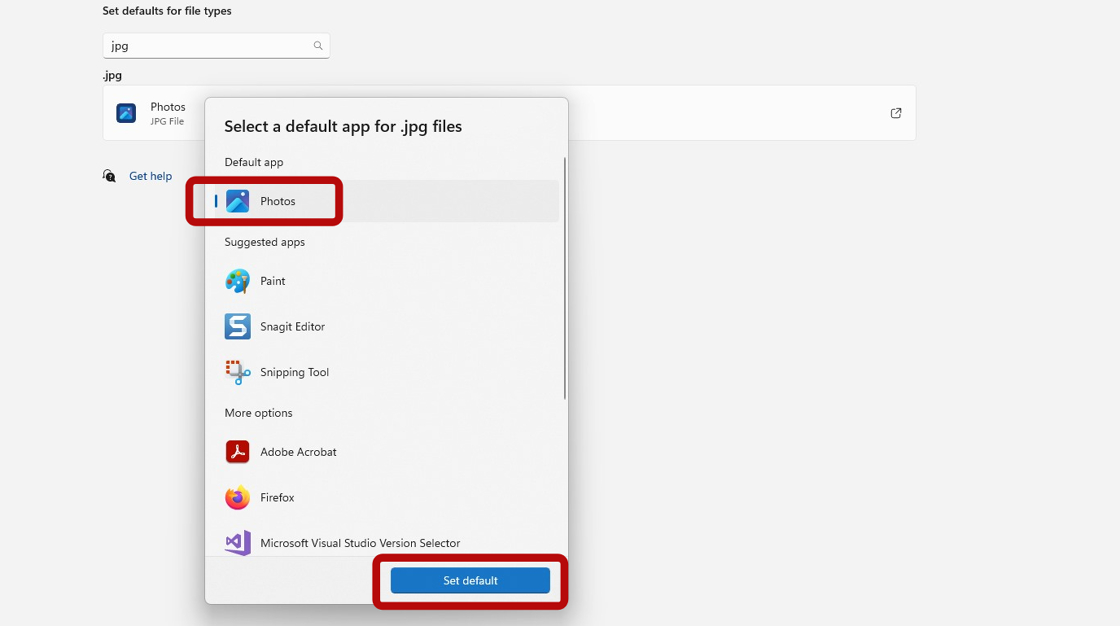
7. In the search bar, type JPG and you click in the field suggested below to expand your options

8. In this example, for the JPG file extension you will choose either Photos or Paint as the default app. Then click on the Set Default button.
9. Repeat steps (7 & 8) for all of the following file type extensions:
*Next to each file extension is the suggested application to set for each file type listed
.pdf (Adobe)
.txt (Notepad)
.msg (Outlook Classic)
.eml (Outlook Classic)
.jpg (Photos or Paint)
.png (Photos or Paint)
.doc (Word)
.docx (Word)
.xls (Excel)
.xlsx (Excel)
.xlsm(Excel)
Tip: If you require further assistance, please reach out to our Support Team.
Click on the Contact Support tab in the upper right corner to submit a support request.

You can also initiate a chat by clicking the QAction Support Bot icon.

